
Installing a ceiling fan is a great way to upgrade your home’s look, improve air circulation and lower your energy bill. Whether you’re adding a ceiling fan to your living room or outdoor space, our step-by-step guide will show you how to install a ceiling fan, as well as offer tips and safety considerations to keep in mind.
Ceiling fans play a vital role in enhancing comfort, aesthetics, and energy efficiency within our living spaces. Whether you’re getting relief from boiling summer days or trying to elevate the design of your home, ceiling fans offer a versatile solution for more than just circulating air.
Here we will navigate through the intricacies of ceiling fan installation, maintenance tips, and fixing common issues. From indoor to outdoor, ceiling fans have evolved far beyond their original function to become key features in homes, offices, and outdoor spaces.
Why is my fan wobbling?
Is your ceiling fan starting to make strange noises? Or maybe it is not circulating the air very well? You might have an old or cheaper model ceiling fan installed. If this is the case our suggestion is to look into upgrading to a newer and better quality fan.
If you know you’ve got a quality fan installed and it’s still wobbling, squeaking and is really distracting, there are a few simple things you can do to get it back to circulating air without disturbing the peace.
Give it a clean: Pressure can be built up on the blades if dust has got into the motor and joins of your fan. All you need to do is turn the fan off and dust it down. Then with a damp cloth wipe down the motor’s housing and other intricate parts of the fan. Really make sure you remove all of the dust.
Check the structural support: If you have cleaned your fan, and the wobble is still there, The first thing you should check is the ceiling mount. Ensuring that it has a fan-rated electrical box. Having a fan installed incorrectly can be a huge safety hazard. Ensuring the proper ceiling mount is used will drastically reduce the chance of your ceiling fan falling.
Check for loose parts: If after cleaning and checking the structural support your ceiling fan continues to wobble and squeak, it’s important to inspect for parts that could be causing your fan problems. Focus on areas such as the fan blade holders, as poor tightening can cause the blades to sag, leading to noise, wobbling, and compromised airflow. If you can see drooping fan blades it is a sign they are in need of adjustment or replacement.
Replace fan blades: An easy fix to drooping blades are to tighten the mounting screws. Although some fan blades might just need to be replaced, which is easy As most retailers and manufacturers will carry spare parts and guides on how to replace them.
Can I install a ceiling fan myself?
The simple answer is, No.
It’s required to hire a professional for ceiling fan installation in Australia due to the strict regulations in place and the potential for costly consequences if done by yourself.
Faulty installation or damage caused during the process could void your insurance policy. However, the fact is that DIY electrical work is not only hazardous but also illegal.
Whether it’s a straight replacement, a more complex relocation, upgrading of wiring and switches, or installing a new ceiling fan with supports, A licensed electrician will ensure not only the safe execution of the job but also the correct power supply, switch, and supports for your new ceiling fan.
Can a ceiling fan be installed where a light is?
Replacing an existing light fixture with a ceiling fan is typically very easy in terms of electrical needs. However, it’s crucial to ensure that the electrical box supporting the light fixture can accommodate the additional weight of the ceiling fan.
Proper support is important not only for safety but also to ensure the smooth operation of the fan. As inadequate support may result in instability and inefficiency.
Step-by-step guide to installing a ceiling fan
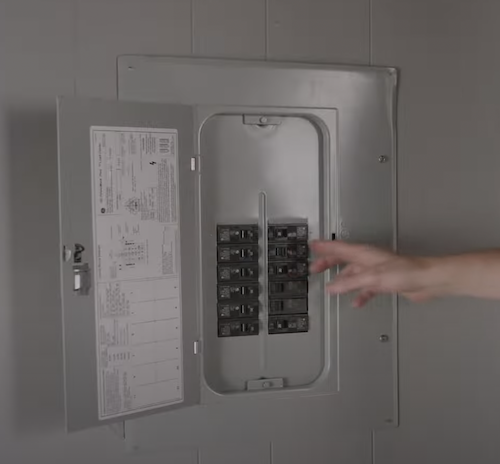
Step 1. Turn off the power
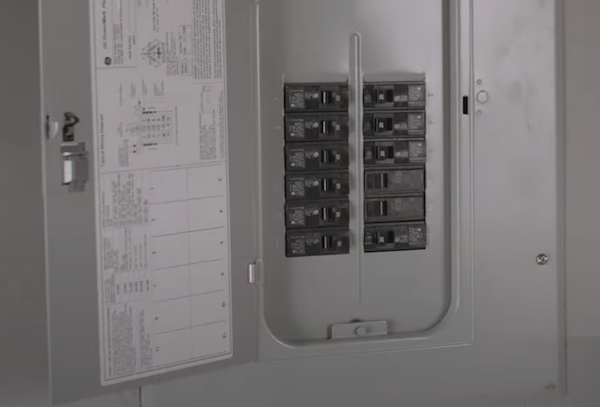
First, turn off your home’s entire power system at your switchboard.
This is to prevent any power from turning on at the fan while installing it which could cause electrocutions and other accidents.
Make sure to leave a note to ensure no one accidentally restores power before completing the installation.
Step 2. Check or install a junction box
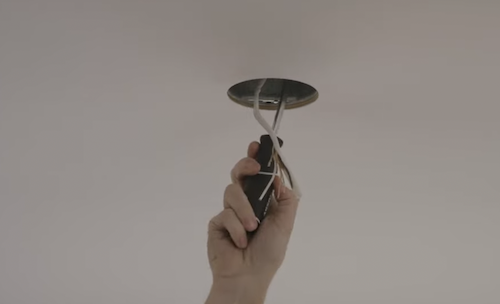
A junction box is a box that sits against the insulation of your home and provides a charge of direct power for certain appliances.
These boxes get installed in the ceiling or walls when installing a light switch, an outlet, or a ceiling fan. You need to check that the junction box is rated for ceiling fan use, if it is not then it will need replacing with one that is.
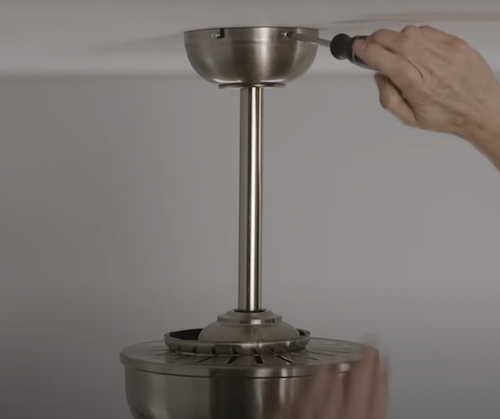
Step 3. Install fan mounting bracket
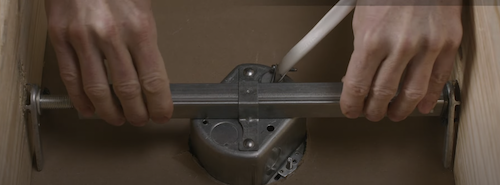
A mounting bracket may come with the fan you purchase, but if not, you will need one that can withstand the weight and fastest speed of the fan.
Slide the mounting bracket over the junction box mounting area and screw it in. You may need to drill holes into the plaster to screw in the bracket, ensuring it is firm and secure.
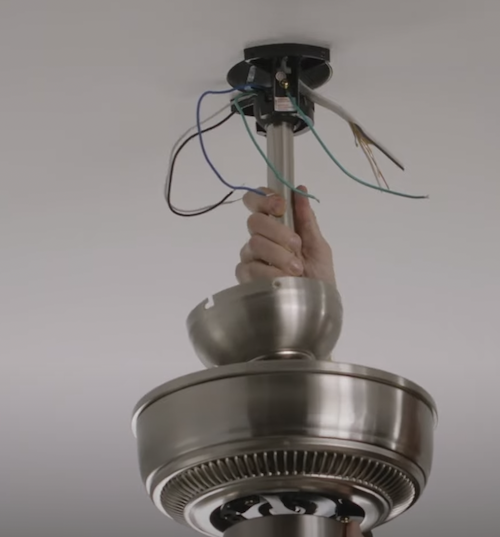
Step 4. Install downrod and assemble the fan
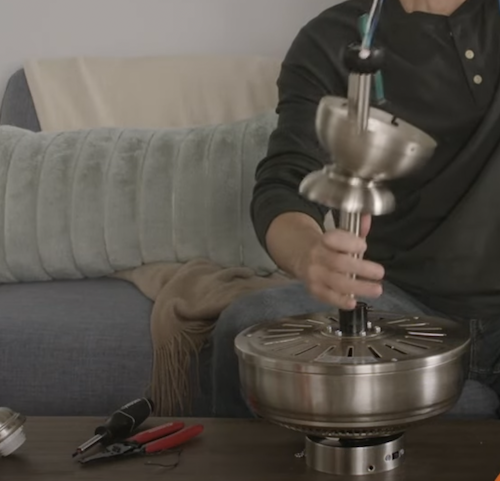
Your electrician will assemble all parts of the fan except the blades before connecting it to the bracket. If your ceiling is over 9 feet in height, a downrod will be needed in order for the fan to work efficiently.
First they will slip the canopy onto the downrod and run the wires through it. Then they will connect the downrod to the base using pins. Finally, they will trim any wires which are too long.
Step 5. Connect wires
Most fans will have 3-4 wires depending on if the fan also has a light fixture.
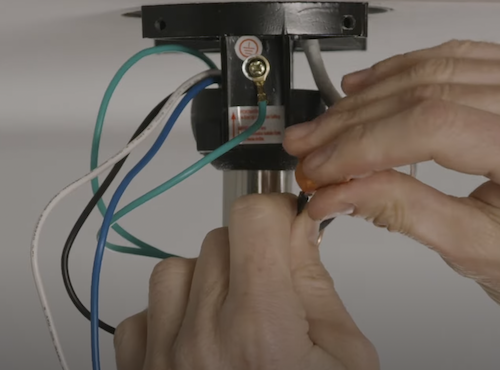
Then, your electrician will connect the fan to the cables from the junction box and to the bracket according to the specific instructions for the fan you’ve purchased (these are usually colour coded).
Then attach the canopy to the mounting bracket to cover up the wires.
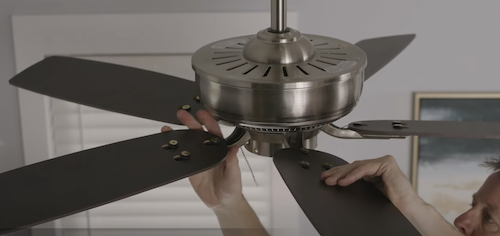
Step 6. Install blades
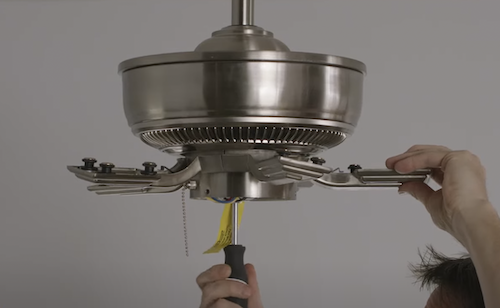
Right now, your fan probably doesn’t look as you think it would; now it’s time to connect the blades to the fan head by screwing them in.
Step 7. Lighting assembly
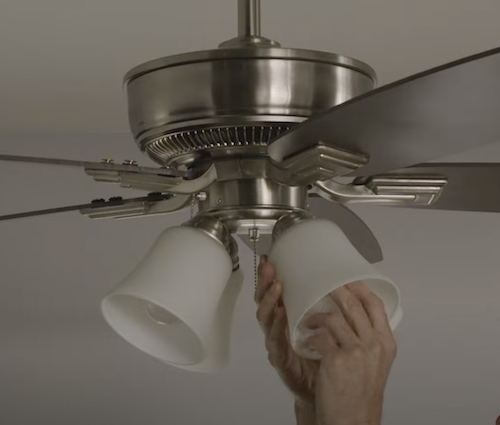
Install the light shades first, then screw in the appropriate light bulbs for your particular fan.
Step 8. Test the fan
The moment you’ve waited for – we’ll turn your electricity back on.
Test the fan for stability and functionality, making sure it isn’t rocking or swinging.

How much does a ceiling fan cost?
So you want to install a new ceiling fan but want to know how much it will cost. Now as with most things, the cost of installing a new ceiling fan will depend on many factors. Such as the type of fan, location, and whether or not there is already a ceiling box installed.
The price of buying a fan varies, choosing the right style will be dependent on the area and design of your space.
The average price of ceiling fans are:
Standard ceiling fan – $100-300
Outdoor ceiling fan – $125-750
Ceiling fan with light – $180-850
Labour for an electrician for the installation, you are looking at a fee between $180- $300, if all necessary wiring and fixtures are in place. However, If you do not have the correct wiring with no existing ceiling box, the cost will rise to 300 or more.
Can a ceiling fan have a light
Yes You Can!
Opting for a ceiling fan and light combination is often ideal for rooms, particularly smaller spaces where having a fan and lights might crowd the space. Having a fan and light combination will give the space a cleaner look and means that both the fan and the lights can be centralised.
This allows there to be more symmetry in your space and overall a more aesthetic look. The variety of ceiling fans available today ensures you won’t have to sacrifice style or aesthetics when selecting a fan and light duo.
In fact, it could be the key factor missing from completing the look of your space, with plenty of combinations to complement modern and minimalist interiors.
Can you have an outdoor ceiling fan
It may seem pointless, however, outdoor ceiling fans make a huge difference when it comes to your outdoor entertaining area, by circulating air and keeping you cool during those hot summer days.
Installing outdoor ceiling fans is a great way to increase the aesthetic and class of your outdoor area, particularly if you enjoy entertaining or dining outdoors.
They also help with getting rid of that unwanted smoke that just lingers around from the barbeque. When considering outdoor ceiling fan installation, ensure you select a fan specifically designed for outdoor use and verify the manufacturer’s warranty.
The installation of ceiling fans offers numerous benefits beyond air circulation. From enhancing comfort and energy efficiency to adding style and ambience to your living spaces, ceiling fans are versatile fixtures that deserve careful consideration and proper installation.
By following safety protocols, selecting the right fan for your needs, and enlisting professional help from an Electrician, you can ensure a seamless installation process that maximises the potential of your ceiling fans.
Whether you’re seeking relief from burning summer days or aiming to take the aesthetics of your home to the next level, installing ceiling fans is a practical and rewarding investment that enhances the overall quality of life in your living spaces.
Looking for a qualified electrician to install your ceiling fan or service your ceiling fan? We can help. Give us a call today.
